Gorilla Trekking with a Camera—Gear and Settings for Great Photos
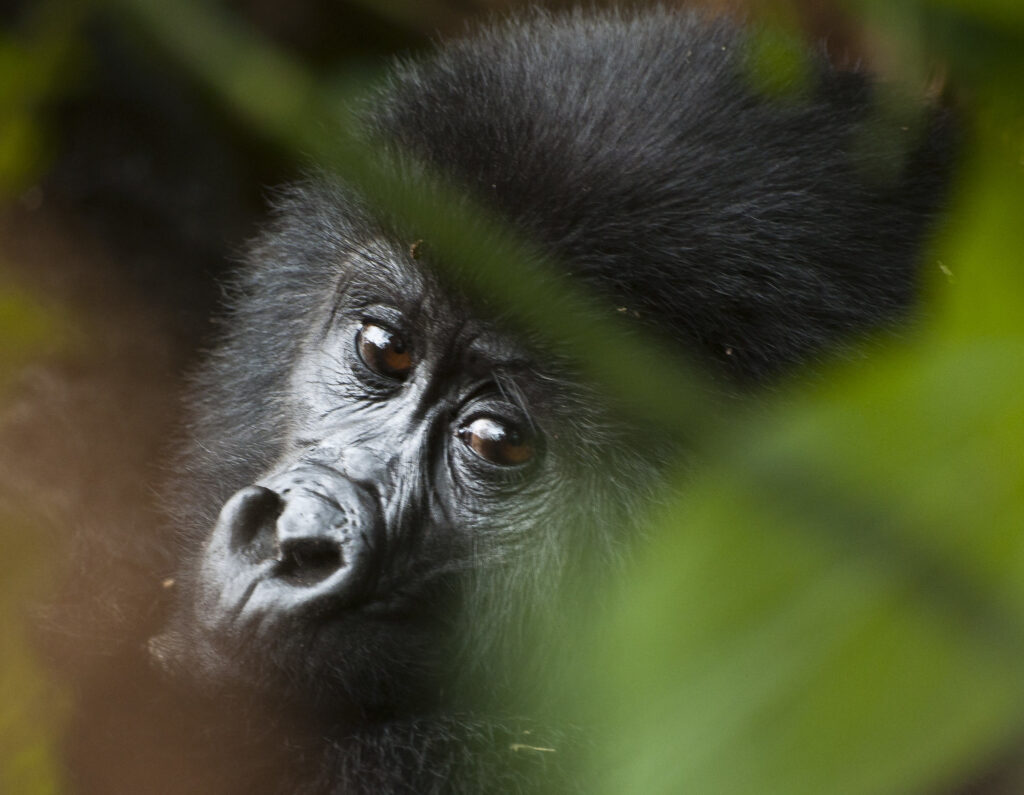
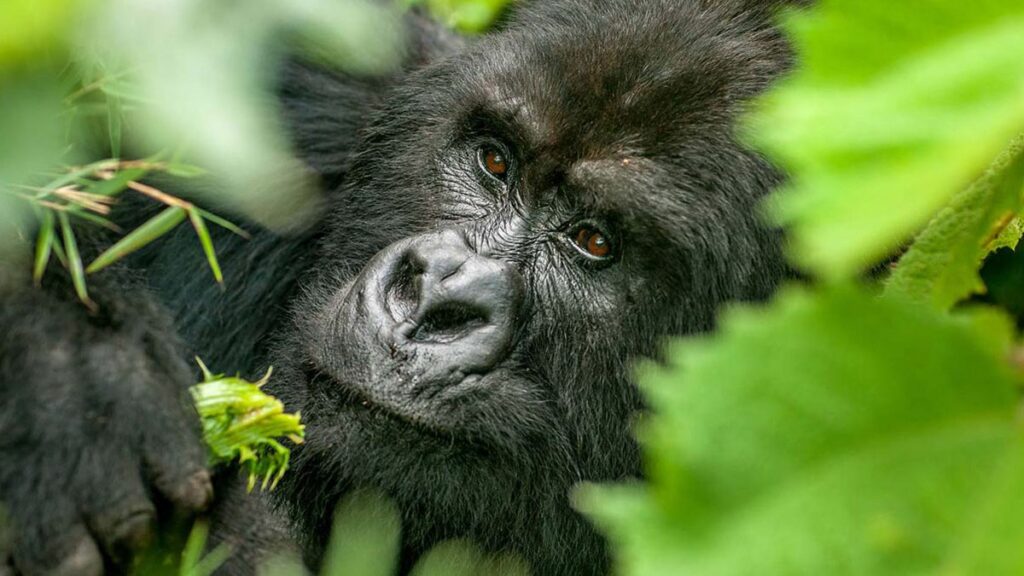
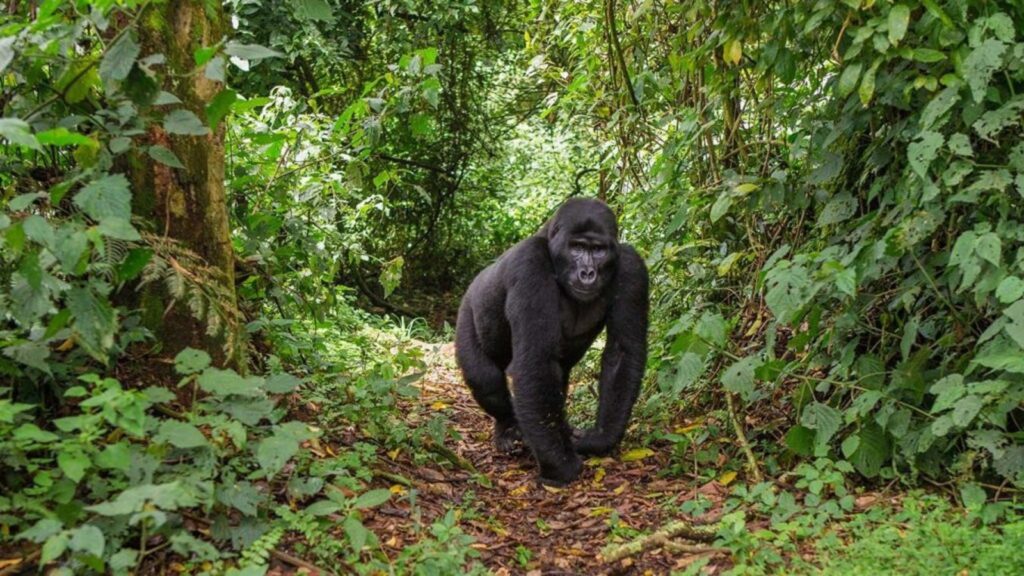
Trekking photography. Photographing gorillas in their natural habitat is a rare and powerful experience. But getting great shots in the rainforest isn’t easy. Low light, fast movements, and thick vegetation all present challenges. With the right gear and settings, you can capture stunning images while still respecting the gorillas and the forest.
Here’s what you need to know before packing your camera for the trek.
Choose the Right Camera
A DSLR or mirrorless camera gives you full control over settings. These models work well in low light and allow quick lens changes. If you’re traveling light, high-end compact cameras with strong zoom capabilities can also deliver great results.
Avoid bulky setups. You’ll hike for hours, and heavy gear can become a burden.
The Best Lenses for Gorilla Photography
Bring a zoom lens with a range of 70–200mm or 100–400mm. This lets you stay at a safe distance while still filling the frame. Gorillas are often in thick cover, so flexibility matters.
Fast lenses with wide apertures (like f/2.8 or f/4) work better in dim light. A wide-angle lens can also help capture the gorillas’ surroundings or group scenes.
Ideal Camera Settings for the Forest
The rainforest has soft, filtered light and fast-changing shadows. Use manual or aperture priority mode to adapt quickly.
- Set ISO between 800 and 3200 depending on the light.
- Choose a fast shutter speed—at least 1/250 to freeze movement.
- Use wide apertures (f/2.8–f/5.6) to create shallow depth and bright images.
- Shoot in RAW to allow better editing afterward.
Auto modes may not respond quickly enough to changing light, so practice manual control before your trek.
Don’t Forget Extra Gear
Bring spare batteries—cold, damp conditions drain them fast. Also carry extra memory cards so you don’t run out of space during your one hour with the gorillas.
A lightweight, waterproof camera bag helps protect your gear from rain and dust. A lens cloth or wipe is useful for clearing moisture from your lens in humid conditions.
Tripods are not recommended. They’re hard to carry, and park rules often don’t allow them near gorillas.
Practice Before the Trek
Learn to adjust settings without looking down. Quick reactions matter in the field. Practice shooting in forested parks or shaded gardens to get comfortable with low-light conditions.
Also test your autofocus settings. Use continuous autofocus to track moving subjects—gorillas don’t sit still for long.
Follow Park Rules and Respect Wildlife
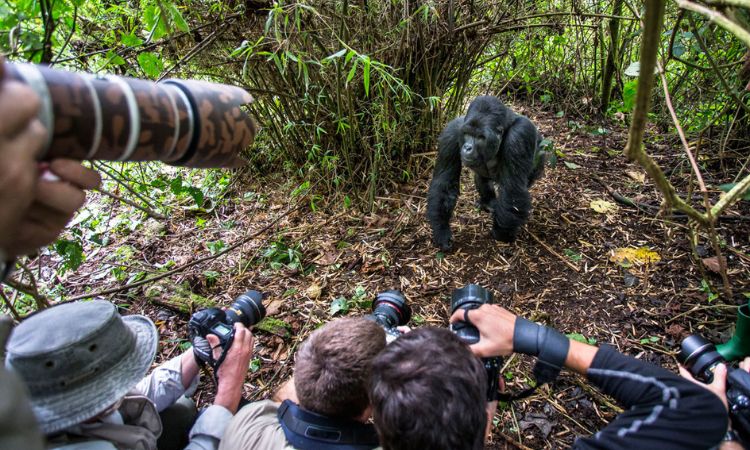
Never use flash—it startles gorillas and is not allowed. Always stay at least 7 meters away. Let the guide position you for the best views. Sudden movements or loud shutter clicks may stress the gorillas.
Respect comes first. A single good photo should never come at the cost of wildlife safety.
Smartphone Cameras: Can They Work?
Yes—modern smartphones with good zoom and night mode can take impressive shots. Use them sparingly and don’t zoom too far digitally; it can reduce quality. A smartphone stabilizer or grip may help you get steadier shots.
Still, nothing beats a dedicated camera in low-light forest settings.
Conclusion
Gorilla trekking offers a rare chance to photograph endangered wildlife up close. With the right camera, lens, and technique, you can return with breathtaking images. But the best shots come when you’re present, respectful, and patient. Focus on the moment. Let your photos tell the story of your encounter.