Gorilla Trekking Vlog Guide: How to Film a Gorilla Trek
Filming a gorilla trekking experience can turn an unforgettable wildlife adventure into a lasting visual story. A well-produced gorilla trekking vlog can show viewers the journey from the moment travelers prepare for the trek to the time they return from the forest. It can capture the landscape, hiking experience, conservation story, guide explanations, and, when permitted, respectful footage of mountain gorillas.
However, filming a gorilla trek requires more preparation than an ordinary travel vlog. The environment can be wet, muddy, and challenging, while the forest may have limited light. Gorilla encounters also follow strict wildlife-viewing rules, meaning vloggers cannot simply move wherever they want to obtain better footage.
The best approach is to plan the story before entering the forest, use lightweight equipment, protect cameras from rain, and focus on authentic moments. Most importantly, filming must never interfere with the gorillas, guides, or other trekkers.
Plan Your Gorilla Trekking Vlog Before the Trip
A successful gorilla trekking vlog begins before you arrive at the national park. Think about the story you want your video to tell rather than simply recording everything you see.
A useful structure can follow the entire experience. Begin with preparation, travel to the gorilla destination, accommodation, the morning briefing, the start of the hike, the forest environment, the search for the gorillas, the encounter itself, and the return journey.
This structure gives viewers a reason to continue watching because the video develops naturally from preparation toward the main experience.
Write down a few questions you want the vlog to answer. You might want to show how difficult the trek feels, what travelers carry, what the forest looks like, how guides work, and what it is like to finally encounter mountain gorillas.
Planning does not mean scripting every sentence. Leave room for spontaneous moments because some of the most interesting parts of a safari cannot be predicted.
Choose Equipment You Can Carry Comfortably
Gorilla trekking can involve hiking through steep and uneven terrain, so your filming equipment should remain manageable.
A lightweight mirrorless camera, compact camera, or modern smartphone can work well for travel vlogging. A versatile zoom lens can also reduce the need to change lenses in the forest.
Bring spare batteries and memory cards because you may spend several hours away from charging facilities. Carry equipment in a protective bag that can withstand rain and forest moisture.
A small microphone can improve the quality of your narration, but remember that natural forest sounds can also contribute to the atmosphere of the video.
Avoid bringing unnecessary equipment simply because you own it. Every additional kilogram becomes noticeable when you are hiking uphill through difficult terrain.
Film the Journey Before the Trek
Do not begin your vlog when you reach the gorillas. The journey itself is part of the story.
Record short clips showing the road to the trekking destination, surrounding landscapes, accommodation, early-morning preparation, and the equipment you are carrying.
You can also film yourself explaining what you expect from the day. This creates a personal introduction and gives viewers context before the hike begins.
Capture details such as boots being prepared, rain jackets being packed, breakfast before departure, and the drive toward the park headquarters.
These small shots are useful during editing because they create transitions between major parts of the story.
Film the Park Headquarters and Briefing
The pre-trek briefing provides important information and can become one of the most educational sections of your vlog.
With permission, record the surroundings at the park headquarters and explain what happens before the trek begins. You can introduce your guide, describe the trekking process, and explain the importance of following conservation rules.
Do not film people without appropriate permission. Respect the privacy of guides, porters, and other visitors.
The briefing also gives you an opportunity to explain that gorilla trekking is not a conventional zoo visit. Visitors enter a protected forest environment and must follow instructions designed to protect both people and gorillas.
This context can make the eventual gorilla encounter much more meaningful for viewers.
Film the Hiking Experience
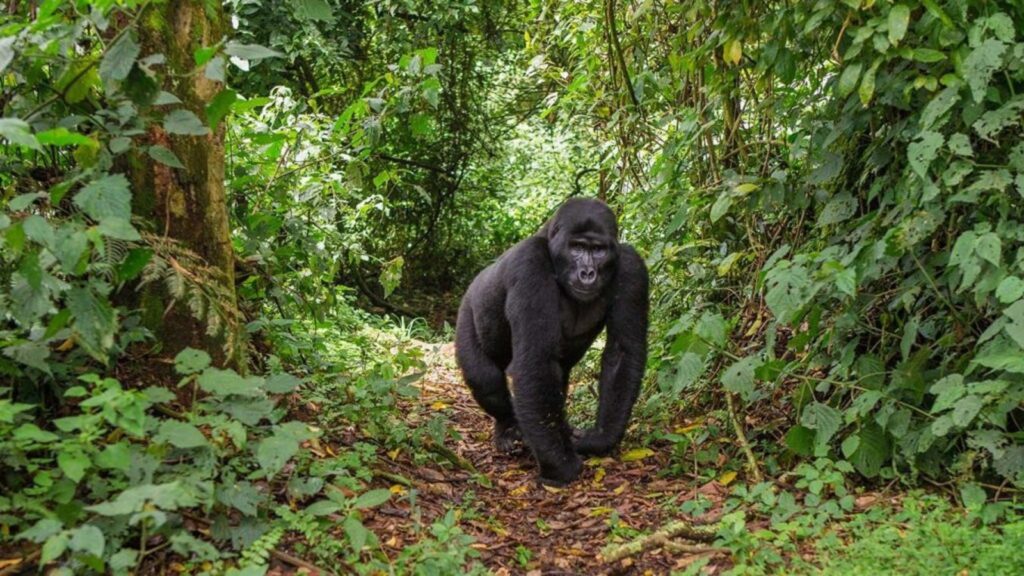
The trek itself should occupy an important part of your vlog. Viewers want to understand what it actually feels like to walk through gorilla habitat.
Capture short clips rather than recording continuously. Film your boots moving along the trail, vegetation, forest scenery, steep sections, muddy paths, and moments when you stop to rest.
You can occasionally speak directly to the camera and explain how you are feeling. If the terrain becomes difficult, describe the experience honestly rather than pretending that everything is effortless.
Remember that the purpose of these shots is storytelling. You do not need to record every step.
A sequence of several short clips can communicate the experience more effectively than a single long recording.
Use Natural Forest Sounds
Sound can make a gorilla trekking vlog feel much more immersive.
Record birds calling, insects, footsteps, moving vegetation, flowing water, and other natural sounds when appropriate. These sounds can later be used underneath narration or transitions.
Avoid talking constantly while filming. Sometimes several seconds of natural forest sound can communicate the atmosphere better than narration.
If your camera microphone struggles in windy conditions, a small external microphone can improve voice quality. However, always prioritize the wildlife experience and follow instructions from your trekking team.
The forest itself is part of your story.
Film Your Reaction to Finding the Gorillas
The moment your group finally encounters the gorillas can become the emotional center of the vlog.
Your reaction before the encounter may be just as valuable as the gorilla footage itself. Capture your excitement when the trackers indicate that you are getting close, provided doing so does not disturb the group or interfere with the trek.
Once you reach the gorillas, concentrate on observing rather than continuously filming.
You can later explain what you saw and how the encounter felt. This creates a more authentic story than trying to narrate every second while standing near the animals.
Your viewers are interested not only in what the camera sees but also in what the experience means to you.
Film Gorillas From the Permitted Position
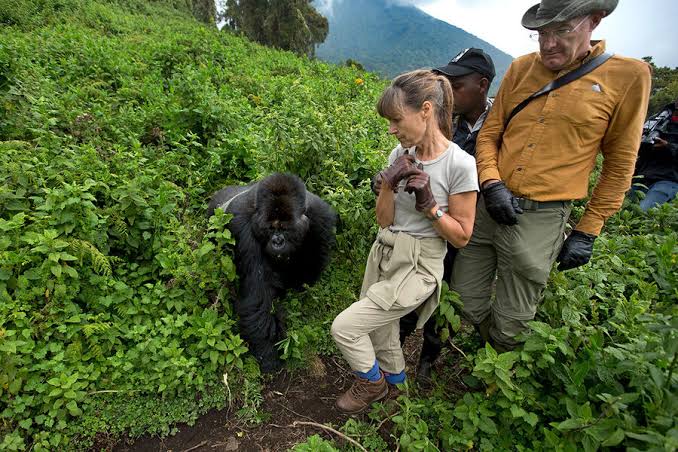
Wildlife filming requires discipline. You must remain within the distance and positioning requirements established by the park authorities and trekking team.
Never move closer to a gorilla simply to obtain a better camera angle.
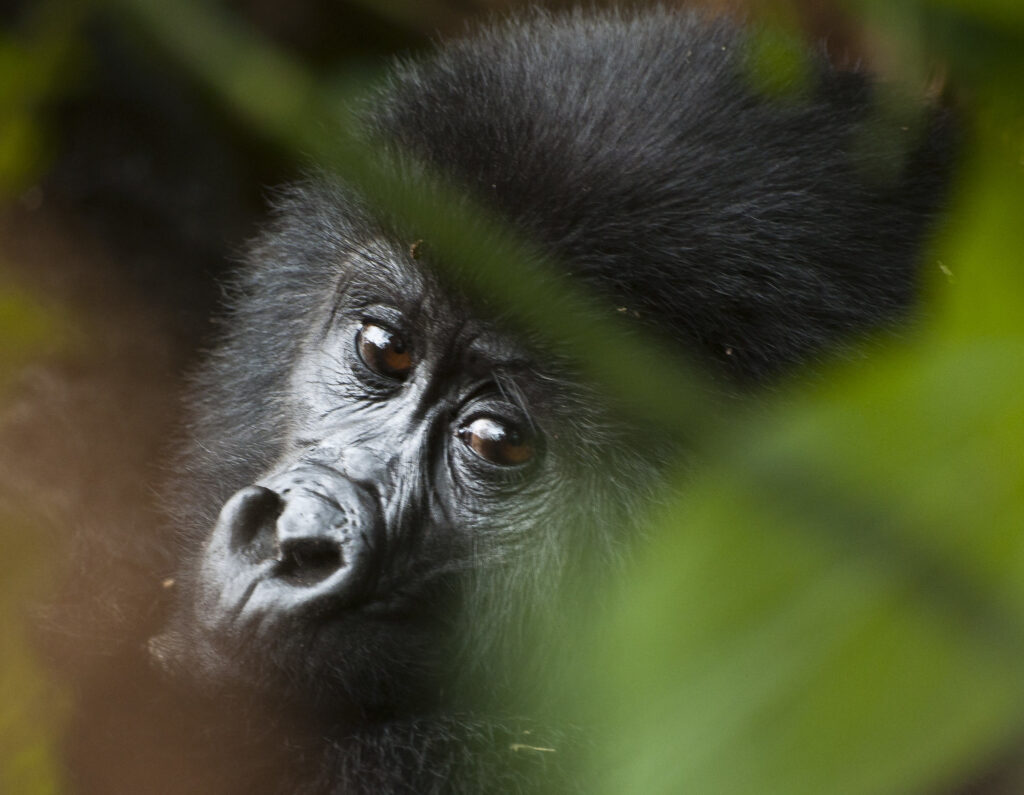
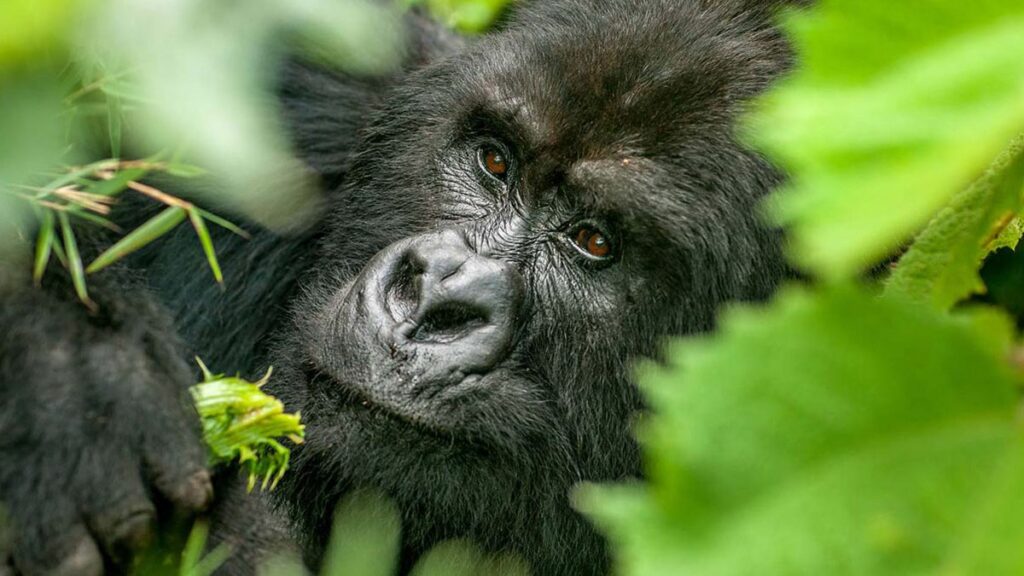
If vegetation partially blocks your view, work with the available composition rather than attempting to change the situation. A partially obscured gorilla can actually produce a more natural image because it shows the animal within its forest environment.
Listen carefully to your guide and trackers. They understand the animals’ behavior and can tell you where you should stand and how to respond to changing circumstances.
A good wildlife filmmaker adapts to the animal rather than forcing the animal to adapt to the filmmaker.
Do Not Use Flash Without Permission
Flash photography and filming can disturb wildlife, so vloggers should follow the specific instructions of the park and trekking staff.
Whenever flash is prohibited, disable it before entering the forest.
Natural light can still produce beautiful footage. Forest conditions may be dark, but modern cameras and smartphones can perform well in low-light situations when used correctly.
You can also adjust exposure and ISO settings where your equipment allows it.
Most importantly, do not prioritize brighter footage over responsible wildlife viewing.
Keep Your Camera Steady
Shaky footage can make an otherwise excellent vlog difficult to watch.
A small grip, compact tripod, or image stabilization system can help produce smoother footage. However, equipment should remain practical for hiking.
When filming handheld, hold the camera with both hands where possible and keep your movements slow. Instead of rapidly turning from one subject to another, make deliberate movements.
You can also record several short static shots. For example, film the forest for ten seconds without moving the camera, then record another short clip from a different position.
These clips become much easier to edit into a professional-looking sequence.
Protect Your Camera From Rain
Rain protection is essential when filming in mountain gorilla habitat.
Carry waterproof covers or protective bags for your camera and other electronic equipment. Even if the morning begins dry, forest conditions can change quickly.
Protect spare batteries and memory cards from moisture as well.
If rain begins during the trek, prioritize protecting your equipment rather than continuing to film. A wet camera can quickly turn an exciting safari into an expensive equipment problem.
Rain can also become an interesting part of the vlog. If conditions permit, capture short shots of raindrops, wet vegetation, and trekkers putting on rain gear.
These scenes can add atmosphere to the final video.
Film the Guides and Trackers Respectfully
Guides and trackers play an important role in the gorilla trekking experience. They locate gorilla families, interpret animal behavior, and help visitors move through the forest safely.
With permission, include them in your vlog.
Ask them simple questions about their work, the forest, and gorilla behavior and conservation. Their knowledge can provide information that you could not obtain from a standard travel narration.
Do not interrupt them while they are working. If the trackers are concentrating on locating gorillas, allow them to do their job.
A short interview before or after the trek may be better than attempting to conduct a conversation during the gorilla encounter.
Show the Conservation Story
A strong gorilla trekking vlog should explain more than the tourist experience.
Mountain gorilla tourism exists within a broader conservation system. Protected forests, monitoring, ranger activities, tourism regulations, and local communities all contribute to the protection of the species.
Use your vlog to explain why visitors must follow rules around the gorillas.
You can also discuss how responsible tourism connects travelers with conservation and local communities.
This gives your video greater depth and helps viewers understand that gorilla trekking is not simply about obtaining photographs of an endangered animal.
The conservation story can also distinguish your vlog from videos that focus only on entertainment.
Avoid Filming Other Tourists Without Permission
Your vlog should respect the privacy of other people.
Avoid pointing your camera directly at strangers or recording private conversations. If another traveler appears clearly in your footage, consider asking for permission before publishing the video.
This is particularly important when filming emotional reactions, conversations, or personal moments.
You can often capture the atmosphere of a trekking group without identifying individual travelers.
Respecting other visitors also helps maintain a positive relationship with the people sharing the experience with you.
Create a Story Instead of a Collection of Clips
One of the biggest mistakes beginner vloggers make is producing a video containing dozens of unrelated clips.
A strong vlog has a beginning, middle, and end.
The beginning introduces the destination and your expectations. The middle shows the journey through the forest and builds anticipation. The climax introduces the gorilla encounter. The ending reflects on what you experienced.
This structure keeps viewers engaged.
You do not need to show every detail. Select the clips that move the story forward.
A five-minute video containing carefully selected footage can be more enjoyable than a thirty-minute video containing every recording from the day.
Edit the Vlog for a Natural Pace
After the trek, review your footage and identify the strongest moments.
Remove repeated clips, accidental camera movements, and long periods where nothing happens. Keep enough environmental footage to give viewers a sense of place.
Use transitions sparingly. Wildlife footage often looks better with simple cuts rather than excessive visual effects.
Music can add atmosphere, but do not allow it to overpower natural forest sounds or your narration.
Keep the most important footage for the appropriate part of the story. Do not reveal the entire gorilla encounter in the opening seconds if you want viewers to experience the journey toward that moment.
Add Context With Maps and Text
Simple graphics can help viewers understand where your trek took place.
You can introduce the country, national park, and trekking sector when appropriate. A simple map can show where the destination lies within Uganda or Rwanda.
Text overlays can explain terms such as “mountain gorilla,” “silverback,” “habituation,” and “conservation.”
Avoid covering important parts of the footage with large text.
The goal is to help viewers understand the experience without distracting them from the wildlife.
Create a Strong Vlog Thumbnail
Your thumbnail is one of the first things potential viewers see.
Choose a clear photograph that communicates the subject immediately. A well-composed gorilla portrait, dramatic forest scene, or authentic trekking moment can work well.
Keep text minimal. If you use text, make it short and easy to read on a mobile screen.
Avoid misleading thumbnails that show something completely different from the actual experience.
A strong thumbnail should attract attention while accurately representing the video.
Write a Search-Friendly Vlog Title
The title should tell viewers exactly what they will see.
Examples include “Gorilla Trekking in Uganda: Our Complete Vlog Experience,” “Gorilla Trekking in Bwindi: From Forest Hike to Gorilla Encounter,” or “Gorilla Trekking Vlog: What the Trek Is Really Like.”
Include the destination when it is relevant.
Using phrases such as “gorilla trekking Uganda,” “Bwindi gorilla trekking,” or “gorilla trekking vlog” can help communicate the subject clearly to potential viewers.
However, avoid stuffing the title with keywords. A natural title that makes a clear promise is usually more appealing than a long list of search terms.
Share Short Clips on Social Media
Your main vlog can generate additional content for social media.
Short vertical clips can highlight memorable moments from the full video. A few seconds of forest hiking, a dramatic landscape, or a carefully filmed gorilla behavior sequence can become a reel, short, or other social media video.
Keep these clips authentic and ensure that the footage follows the same wildlife-viewing rules as the original vlog.
You can also direct interested viewers toward the full vlog for the complete story.
This creates a content system where one trekking experience can produce a longer video and several shorter pieces of responsible travel content.
Back Up Your Footage
Do not wait until you return home to protect your footage.
If possible, create backups during your trip. Memory cards can fail, cameras can become damaged, and files can accidentally be deleted.
Keep original footage separate from edited copies.
This is especially important when filming a once-in-a-lifetime gorilla encounter. You may never have the opportunity to recreate the same moment.
Good file organization also makes editing much easier. Create folders for travel footage, forest footage, gorilla footage, interviews, and final exports.
Respect the Gorillas. Above the Vlog
The most important rule for any gorilla trekking vlog is that the video should never become more important than the wildlife encounter.
Do not move closer to gorillas for a better shot. Do not make loud noises to attract attention. Do not obstruct other visitors. Do not ignore guide instructions.
The gorillas should remain the priority.
Sometimes the best decision is to put the camera down and simply watch.
Those moments may never appear in your final video, but they are often the memories you will value most.
Conclusion
Learning gorilla trekking vlogs and how to film techniques can help travelers create compelling wildlife videos without compromising the trekking experience. Good preparation, lightweight equipment, stable footage, natural sound, and thoughtful storytelling can transform a collection of clips into a memorable documentary-style vlog.
Start filming before the gorilla encounter so viewers can experience the entire journey. Show the preparation, briefing, forest hike, landscapes, guide expertise, and anticipation before reaching the gorillas. When the encounter begins, follow every instruction from your guides and trackers and work with the position and conditions provided.
Protect your equipment from rain, avoid unnecessary equipment, and edit the final video with a clear beginning, middle, and end. Most importantly, remember that responsible wildlife filmmaking puts the welfare of the gorillas ahead of obtaining the perfect shot.
A successful gorilla trekking vlog should leave viewers entertained, informed, and inspired to appreciate mountain gorillas and the importance of protecting their forest habitat.
Frequently Asked Questions
What camera is best for a gorilla trekking vlog?
A lightweight mirrorless camera, compact camera, or capable smartphone can work well. The best choice is equipment you can comfortably carry through difficult terrain while producing the image quality you need.
Can I film gorillas during a gorilla trek?
Yes, visitors may generally photograph and film the gorillas subject to the rules and instructions of the relevant park authorities and trekking team. Always follow the instructions given during the trek.
Can I use a drone while gorilla trekking?
Do not assume that drones are permitted. Protected areas can have strict rules regarding drones and aircraft. Check with the relevant park authorities before bringing or operating one.
Should I use a GoPro for gorilla trekking?
An action camera can be useful for hiking footage because it is compact and durable. However, its ability to capture distant wildlife depends on the model and lens, so some vloggers may prefer a camera with greater optical reach for the actual gorilla encounter.
How long should a gorilla trekking vlog be?
There is no universal ideal length. Focus on telling a complete story rather than reaching a specific duration. A concise video containing the strongest moments can be more effective than a long video containing repetitive footage.
What should I film during the gorilla trek?
Film the journey, forest environment, hiking experience, guide explanations, conservation context, and appropriate wildlife footage. Short clips of different moments can create a more engaging final story.
What is the most important gorilla trekking filming rule?
Put wildlife welfare first. Never disturb the gorillas, move closer for a better shot, or ignore instructions from guides and trackers simply to obtain footage.